Instructional: Testing your new web site before going live

Web Developers are so used to it that don’t even think about it anymore: Testing a web site before launching it to the public requires “tricking” your browser into retrieving a page from a staging or development server instead of your live web server.
How does that even work? Well, it’s quite simple: Every web server has a numerical internet address (IP address – version 4, in this example). Our site http://www.mac-tech.net lives on a server with the IP address 54.208.23.224
When you enter an URL like http://www.mac-tech.net into your Safari or Chrome address bar, your browser “asks” your Mac to look for the site with that URL.
The server name in that link (www.mac-tech.net) points at a server that hosts that site and serves it to your browser.
Your Macintosh (or Windows) operating system gets the address for that server from that domain’s public domain name service (DNS) which resolves the domain’s server names to numeric IP addresses.
If we have a new version of our site running on a different server (let’s say that new server has the address 22.33.44.55) and you would like to test exactly how that site would look and behave for visitors after being made public, we can’t use the domain’s public DNS to resolve that URL.
Instead, we can tell our Mac to look for that site at a different server without making changes to what the public sees.
Enter the ‘hosts’ (plural) file.
The hosts file, located at /etc/hosts on your Macintosh will answer queries for server (or host) addresses before the domain’s public DNS service is being consulted. All we need is a single line containing the numeric address and the server or host names used:
22.33.44.55 www.mac-tech.net mac-tech.net
Adding this line will point every browser and application on your Macintosh to the address 22.33.44.55 whenever a connection to www.mac-tech.net or mac-tech.net is made.
Now, the address in this example belongs to the US military and will not serve up any new mac-tech.net web sites. Sorry.
Back to Web Developers: They probably would, as I do myself, use an arcane terminal text editor like ‘vi’ to make edits to the hosts file. This is what that file looks like:
# ----------------------------
# Default
##
# Host Database
 #
 # localhost is used to configure the loopback interface
 # when the system is booting.  Do not change this entry.
 ##
 127.0.0.1       localhost
 255.255.255.255 broadcasthost
 ::1             localhost
If we add this line to the hosts file:
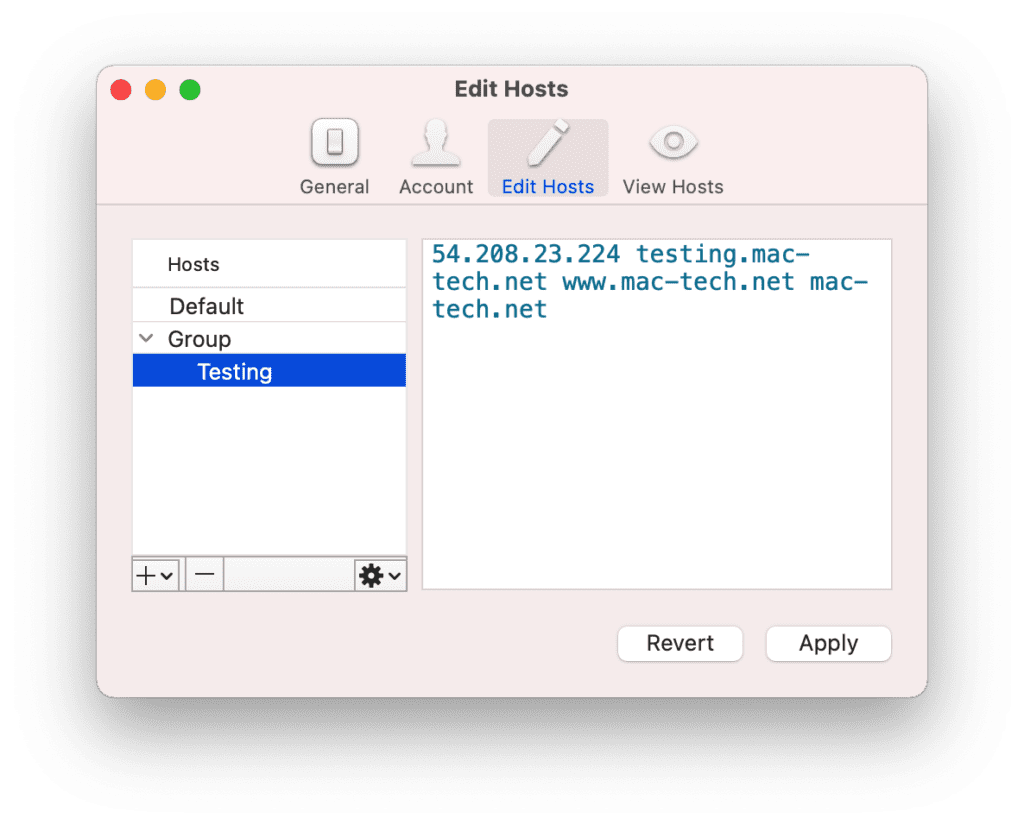
54.208.23.224 testing.mac-tech.net www.mac-tech.net mac-tech.net
… the URL http://testing.mac-tech.net/ will display a site on our server, even though the general public will find nothing under the host name ‘testing.mac-tech.net’
Instead of ‘vi’, let’s use a tool iHosts by toolinbox https://en.toolinbox.net/iHosts/:
The same above hosts entry would look like this in iHosts:

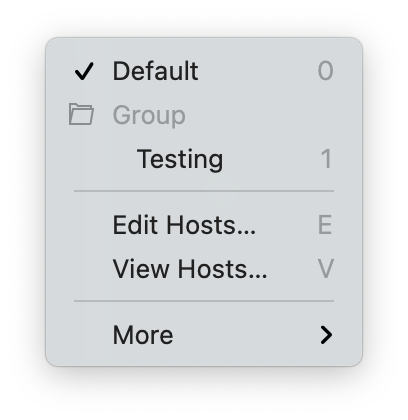
To activate or de-activate that redirection or switch between your live and testing servers, just click and put a checkmark in the menubar app:

I hope this very simple explanation helps and makes life a little easier. Thanks to Zheng for making this great utility.

mac-tech’s co-founder and this post’s author, Florian Feuser, reminds us, “The hosts file, located at /etc/hosts on your Macintosh will answer queries for server (or host) addresses before the domain’s public DNS service is being consulted.”
Comments are closed.